The Complete Pro Roof Restoration Guide: From Inspection to Weatherproofing in 2025
Roofing systems rarely fail without warning. Long before a leak appears inside a building, the signs of deterioration are visible to anyone who knows what to look for. Cracked flashing, granule loss on shingles, pooling water on flat surfaces, and deteriorating sealants around penetrations all signal that a roof is losing its ability to function as intended. What separates a building that handles these early warnings well from one that faces expensive structural repairs is not luck — it is a structured, disciplined approach to assessment and intervention.
In 2025, property owners and facilities managers face a more demanding set of decisions around roof maintenance than previous generations did. Material costs have stabilized after years of supply chain volatility, but labor quality remains inconsistent across markets, and the consequences of deferred maintenance have become harder to ignore as weather patterns grow less predictable. A roof that was adequate five years ago may no longer be performing at the level a building needs. This guide walks through every phase of a professional roof restoration process — from initial inspection through to long-term weatherproofing — so that anyone responsible for a commercial or residential property can understand what good practice looks like and what questions to ask when commissioning work.
Understanding What Pro Roof Restoration Actually Involves
Roof restoration is a process of returning an existing roofing system to a serviceable, weather-resistant condition without full replacement. It is not a patch job, and it is not a cosmetic treatment. A proper pro roof restoration addresses the underlying condition of the existing substrate, resolves structural vulnerabilities, renews protective coatings or membranes, and extends the useful life of the roof in a measurable way. The Pro Roof Restoration guide outlines how this process differs from routine maintenance and why treating restoration as a strategic intervention — rather than a reactive repair — changes the outcome significantly.
The distinction matters because restoration work requires a different skill set and a different approach to planning than standard repairs. A crew replacing a few damaged tiles is performing maintenance. A crew systematically evaluating the entire roof surface, identifying failing seams, replacing deteriorated underlayment, recoating flashings, and applying a weatherproofing system across the full membrane is performing restoration. The scope, sequencing, and quality standards are fundamentally different, and the building owner who understands this is better positioned to evaluate proposals and hold contractors accountable.
When Restoration Is the Right Decision
The choice between restoring and replacing a roof depends on the structural integrity of what already exists. If the decking is sound, the existing membrane or substrate has not suffered widespread delamination, and the fastening system is still functionally intact, restoration is almost always the more efficient path. A full replacement involves tearing off and disposing of existing materials, which adds cost, waste, and time without necessarily producing a better result than a well-executed restoration.
The threshold shifts when the roof has experienced multiple layers of failed repairs, when water infiltration has compromised the insulation beneath the membrane, or when the primary roofing material has reached the end of its service life in a way that cannot be reversed. In those cases, restoration would be building on a compromised foundation, and the investment would not hold. Part of the value of a professional inspection is making this determination with accuracy rather than assumption.
The Inspection Phase: Establishing a True Baseline
Every restoration project begins with an inspection, but not every inspection is equal. A surface-level walkover that notes visible damage is not the same as a systematic assessment that documents moisture presence, adhesion failure, membrane fatigue, and flashing integrity across the entire roof. The inspection is the document that shapes every decision that follows. If it is incomplete, the restoration plan built from it will have gaps, and those gaps will eventually surface as failures.
A thorough inspection examines the roof in zones, starting from the perimeter and working inward. Perimeter edges and termination bars are checked first because they are the most common entry points for water. Penetrations — drains, HVAC curbs, skylights, vents — are inspected individually because sealant failure around penetrations accounts for a disproportionate share of active leaks. The field of the roof, meaning the large open areas between edges and penetrations, is evaluated for surface deterioration, blistering, ponding water evidence, and seam condition.
Moisture Detection and Its Role in Restoration Planning
Moisture within a roofing system is more damaging than most property owners recognize. Water that has entered the insulation layer does not evaporate easily once the roof surface is sealed over it. It sits within the assembly, gradually degrading the insulation’s thermal performance, creating conditions for biological growth, and in some climates, expanding during freeze-thaw cycles in ways that stress the membrane from below.
Professional inspectors use infrared thermography, nuclear moisture gauges, or core sampling to identify wet insulation before restoration work begins. This matters because applying a new coating or membrane over saturated insulation does not solve the problem — it conceals it. The wet material continues to hold moisture, and the new surface will eventually blister, de-bond, or crack as the trapped moisture moves. Identifying and addressing wet areas before the restoration proceeds is not optional; it is a prerequisite for the work to hold.
Surface Preparation: The Work That Determines Longevity
Among all the phases of a roof restoration, surface preparation is the one most often compressed when contractors face schedule pressure or budget constraints. It is also the phase that most directly determines how long the finished restoration will last. A coating or membrane applied to a surface that has not been properly cleaned, primed, and repaired will fail prematurely — not because the material is defective, but because adhesion depends entirely on what it is bonding to.
Preparation typically includes mechanical or chemical cleaning to remove dirt, algae, and oxidation from the existing surface, followed by inspection of cleaned areas to identify additional damage that was not visible before cleaning. Cracks, open seams, and deteriorated flashing are addressed at this stage. On metal roofing systems, rust is treated and primed before coating. On single-ply membrane systems, seams are tested and re-adhered where necessary. On built-up roofing, blisters are cut, dried, and patched before any new material is applied.
Why Primer Selection Affects System Performance
Primers serve as the bonding layer between the existing substrate and the restoration materials being applied. Different substrates require different primer chemistry. A primer that performs well on concrete or masonry may not develop adequate adhesion on a polyurethane foam surface, and using the wrong product creates a weak interface that will fail under thermal cycling or wind uplift stress.
Professional restoration contractors match primer selection to substrate type based on documented compatibility, not convenience or availability. This is one of the areas where the difference between an experienced restoration contractor and a general roofer becomes most apparent. The decision is technical, it requires knowledge of material chemistry, and making it incorrectly adds no visible cost at the time of application but creates measurable failure risk over the following years.
Repair and Structural Reinforcement Before Coating
Restoration is not simply a process of coating over an aging surface. Before any protective system is applied, the existing roof must be returned to a condition that can support and hold what is being applied. Flashing at walls, curbs, and penetrations is reinforced or replaced. Open joints and cracks are filled with compatible sealants. Areas where the membrane has separated from the deck are re-adhered. Drainage paths are cleared and, where needed, reconfigured to prevent future ponding.
This phase of the work is unglamorous and largely invisible once the project is complete, which is part of why it is undervalued. A property owner reviewing a finished roof restoration sees a clean, uniform surface. They cannot see whether the flashings were properly embedded, whether the seams were re-adhered across their full length, or whether the drains are pitched correctly. The work that happens in this phase is taken on trust — which is why contractor selection and documented scope matter so much before work begins.
Reinforcing High-Stress Areas
Certain areas of a roof experience significantly more stress than others. Corners, angle changes, drains, and the edges of penetrations are all points where membrane movement is concentrated. Thermal expansion and contraction, wind load, and foot traffic from maintenance personnel all affect these zones more intensely than the open field of the roof.
Professional restoration work addresses these areas with reinforcement fabric or additional layers of material, depending on the system being used. The goal is to ensure that the zones most likely to experience cracking or separation have more material capacity than the surrounding field, not less. This approach, which is standard practice in quality restoration work, is part of what the Whole Building Design Guide identifies as essential to long-term roofing system performance.
Weatherproofing Systems and How They Differ
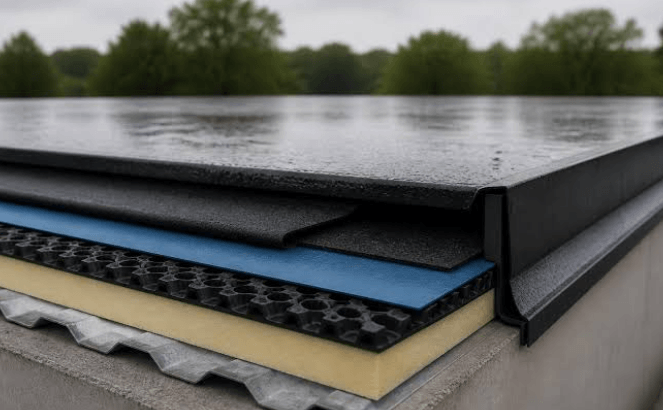
The final layer of a roof restoration is the weatherproofing system — the material that forms the new weather barrier. The type of system selected depends on the existing roof type, the climate the building is located in, the level of foot traffic the roof receives, and the desired service life of the restoration. There is no single correct answer, but there are systems that are better matched to specific conditions than others.
Fluid-applied coatings, including acrylic, silicone, and polyurethane formulations, are commonly used on low-slope roofing because they can be applied seamlessly, conform to irregular surfaces, and provide a continuous membrane without joints. Modified bitumen or torch-applied systems are used where a thicker, more mechanically robust membrane is needed. Single-ply overlay systems are used in cases where the existing roof requires a more complete membrane replacement without full tear-off.
Thermal Performance and Energy Implications
Reflective weatherproofing coatings have a measurable effect on building thermal performance, particularly in climates where cooling loads are significant. By reflecting solar energy rather than absorbing it, a reflective coating reduces heat transfer through the roof assembly, which in turn reduces the demand placed on HVAC systems during peak conditions.
This is not a trivial consideration in commercial buildings, where rooftop heat gain can represent a meaningful share of cooling costs. A pro roof restoration that incorporates a reflective weatherproofing layer is addressing both the protective function of the roof and its contribution to building energy performance simultaneously. The two goals align in most cases, which makes reflective systems a logical default for buildings in temperate or warm climates where cooling is a regular operational cost.
Post-Restoration Documentation and Ongoing Maintenance
A completed roof restoration should produce documentation that becomes part of the building’s maintenance records. This includes inspection reports from before the work began, photographic evidence of the condition at each phase, product data sheets for all materials applied, warranty documentation from both the contractor and the material manufacturer, and a recommended maintenance schedule for the restored system.
Ongoing maintenance after a restoration is far less intensive than the restoration itself. Annual inspections, clearing of drains before wet seasons, and prompt attention to any new penetrations or damage from rooftop equipment installation are the primary activities. Systems that receive this level of consistent attention after restoration routinely achieve the full service life that quality materials are capable of delivering.
See also: How a Business Attorney Greenville SC Can Help Your Business
Conclusion: Why Process Discipline Defines the Outcome
Roof restoration is one of those disciplines where the quality of the outcome is almost entirely determined by decisions made before the visible work begins. The inspection sets the baseline. The surface preparation determines adhesion. The repair phase determines whether the new system has sound substrate beneath it. The weatherproofing selection determines how the roof handles the specific stresses of its environment. Each phase depends on the one before it.
Property owners and facilities managers who approach pro roof restoration as a structured, phased process — rather than a single transaction — consistently achieve better results and longer system life. The questions worth asking before commissioning any restoration work are straightforward: What is included in the inspection? How will moisture be detected and addressed? What preparation work is in scope? What are the warranty terms and what do they require in terms of ongoing maintenance? A contractor who can answer these questions clearly and in detail is a contractor who understands what the work actually involves. That understanding, more than any single material or technique, is what separates a restoration that holds from one that does not.