Filling Capping Explained: How the Two Steps Work Together on a Packaging Line
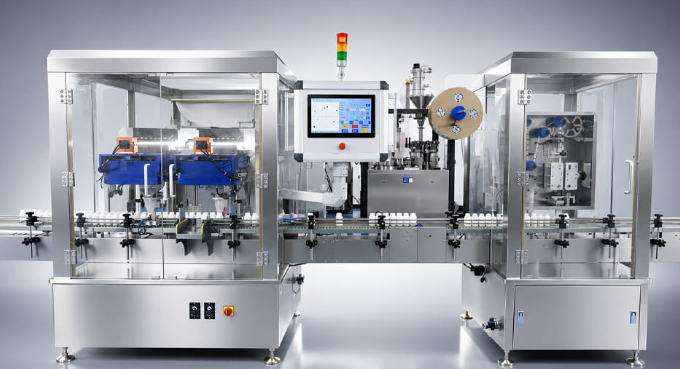
In many factories, filling and capping are treated as two separate jobs, often done by different people or even in different areas. Yet the two steps are closely linked. A bottle that is filled well but capped badly can leak, spoil, or arrive at the customer with a loose lid. That is why many producers now look at filling capping as one connected process instead of two unrelated tasks. You can see examples of combined equipment in this filling capping category.
What happens in filling
During filling, the machine delivers a measured amount of product into a container. Depending on the product, this may be done by gravity, piston, pump, or another method. The goal is a consistent amount in every container, with minimal spillage on the neck and outside of the bottle.
What happens in capping
Capping closes the container. There are several types of closures, including screw caps, press on caps, pump dispensers, and trigger sprayers. Each needs a different action. Screw caps need to be tightened to a suitable torque, press on caps need steady downward force, and dispensers need correct alignment before closing.
Why the two steps should be coordinated
If the filling stage leaves product on the bottle neck, the cap may not seal properly. If the gap between filling and capping is too long, the product can be exposed to air or dust. If the cap goes on while the bottle is moving unevenly, it may sit crooked. When both stages sit on one connected line or inside one machine, containers move directly from the filling station to the capping station with little handling in between.
Benefits of a combined approach
- Fewer steps where containers need to be moved by hand
- Less exposure of open containers to the surrounding air
- A smaller footprint than two separate machines in some layouts
- Easier training, since operators learn one system
- Better coordination of speed between the two steps
These benefits depend on the specific machine and layout, so it is wise to confirm details with the supplier rather than assume.
Matching the machine to your closure
Always tell the supplier exactly which caps you use. Send samples if possible. A machine that handles one cap style well may struggle with another. The cap size, thread type, and material all matter. Inconsistent caps from your own supplier can also cause problems, so check that your closures are made to steady dimensions.
Torque and sealing
A cap that is too loose can leak, while one that is too tight may crack the cap or deform the bottle. Good capping equipment allows adjustment of tightening force. After setting it, test sample bottles by turning them upside down and checking for leaks, and verify that the cap removes with normal hand effort.
Cleaning and maintenance
Because filling often involves liquids that can drip or splash, the whole line needs regular cleaning. Capping heads, chucks, and guides also wear over time. Keep a maintenance schedule, check for worn parts, and keep spares for items that wear fastest.
Planning for the future
If you expect to add labelling or date coding later, ask whether the filling capping equipment can connect to those machines. A little planning now avoids layout problems when your business grows.
Final thoughts
Filling and capping may look like simple steps, but together they decide whether your product reaches the customer in good condition. By understanding how the two stages affect each other, describing your containers and closures clearly, and testing before buying, you can build a packaging process that is steady, clean, and efficient. Take the time to review your needs, compare options, and choose equipment that supports your product from the first bottle to the last.